Why do we get dental crowns that don’t fit?
Part 2:
When a crown doesn’t seat, the question of why it doesn’t will go back and forth between the lab and the dentist. Inevitably fingers are pointed, and blame assigned. The lab technician always asks the dentist, “Does the crown seat on the die?” This usually angers the dentist.
I had a conversation with an ex-account years ago where I was told, “My friends and I always make fun of the labs, because they say it fits the die. It doesn’t matter if it fits the die. It has to fit the tooth.”
Read part one of this article: The crown the lab made doesn't fit
Teamwork and communication are key
Dental technicians are just an extension of the dentist. They can only produce restorations based on what they get. Teamwork is essential and so is communication. It’s no one’s fault; it’s the cost of doing business. For a dentist to have the attitude that it’s always the labs’ fault and “the die does not matter,” or for the lab techs to think dentists have no clue and that lab techs are the unsung heroes of dentistry, is a waste of time and energy.
As mentioned in my previous article, “The crown the lab made doesn’t fit: Why does this happen?” there are various reasons for ill-fitting crowns.
Reasons for poorly fitting crowns:
- Materials used; material not setting correctly during impression
- Expiration dates
- Weather and humidity
- Water/powder ratio
- Length of time the delivery service took
- Location for storage
- Not enough retraction for the impression to pick up the margin
- Deep undercuts that prevent the impression from being drawn without tearing it
- Poorly prepped tooth without an adequate finish line
- Improperly poured models or die
- Tear in the impression
A call or email picture of this die should be sent to the dentist who is questioning the accuracy of the impression. The answers vary from, “Yeah, I know, this patient is a nightmare and had so much bleeding; can you work with it?” to “Oh, wow, you’re right. Let me take another impression. That’s a difficult prep; send it to me and I will trim it.” Often the dentist will say, “Let me see the impression. It looks fine to me.”
Additional reading:
- Top 5 questions you should ask a lab before you send them a case
- Prevention of titanium base debonding and failure
Again, let's analyze this. The die is created by pouring a material like stone into the impression. The die is the result of the impression. Looking at the impression and not looking at the die is equal to saying that fitting the die does not matter. If you don’t trust your lab to be able to evaluate the die poured from your impression, then it's time to find a new lab. The dentist-lab partnership is crucial for successful work.
What about digital scanners?
A digital scanner is not a magic wand. If you cannot take a quality impression with material, why do you think that a scanner would make it easier or better? If the camera cannot see the margin, then it will not be able to reproduce it. One of the reasons so many scanners in the past ended up being expensive doorstops was a failure to understand how to use them and an expectation that they would be so much easier to use than taking traditional impressions. One great feature of digital scanning is the ability to send the scan to the lab and get an immediate response on the accuracy of the scan and the bite. Adjustments can be made and rescanned instantly instead of having to bring the patient back in for a new impression.
How do implant impressions compare to natural tooth impressions?
Implant impressions seem like they should be cut-and-dried, but there’s a lot to consider.
What to be aware of prior to creating an impression:
- Implant, brand, diameter, and connection
- Impression parts that match the diameter, and the brand
- Open tray or closed tray
- Screwdriver to match the implant system
- Proper engaging or nonengaging impression copings
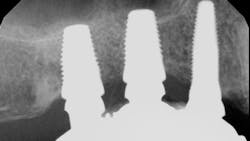
Make sure everything is ready for the day of impression. X-ray the impression coping in the mouth. Each implant manufacturer has different lines of implants, different connections, and different diameters. Many have the same interface as other manufacturers. Make sure you have the correct one. There are implant lines that have multiple-diameter implants but the same diameter interface. This means that a wide-diameter impression coping can seat and engage on a narrow implant and vice versa. If an x-ray is not taken, the lab will seat the corresponding analog and make the crown. The mistake won’t be caught until an x-ray is taken at the time of insertion. If you are using another brand’s impression coping on a compatible implant and it has play in it, it can result in an ill-fitting restoration.
Study up on the proper fit and look at how the parts engage each other. There are many implants now that have a built-in platform switch. They may appear to not be seating when, in fact, they are. Familiarize yourself with the top and bottom of the part. More than once I’ve seen impression copings placed upside down in an impression. If going with an open-top impression coping, make sure to use the correct part that has grooves and rough angles on it to grip the impression material and keep it secure in the impression. If the smooth, resettable, closed-top tray style is used, it will be able to rotate or move in transit. Make sure the proper body impression material is used to firmly grip that coping so it doesn’t move or fall out. Many impression copings end up moving or wobbling in a flimsy impression.
Multiple dental implant/teeth impressions
When doing an implant bridge, using a verification jig prior to casting the final bridge is the easiest way to guarantee a proper seat. It also reduces the visits. If the jig fits and an x-ray verifies the fit, the final case will fit. A setup or acrylic bite registration can be made onto the jig. This way the bite is verified, and the lab can go right to completion. For a tooth-borne bridge, a frame try-in is always advisable. Of course, checking the margins and fit is easier without the porcelain on it. But if going right to finish, make sure the preparations are parallel to each other. If the teeth are not parallel, the bridge will not be able to seat. One way to ensure this is to take a quick impression and pour in the office. Use a surveyor and check your parallelism before taking the final impression. Using the temp as a basis for fit will not be accurate. Acrylic can and will bend, plus the margins are not sealed like a final restoration. A temp may be able to seat on those teeth, but a rigid frame will not.
Finally, when seating any bridge or even a single unit, look at the relationship of the intaglio surface and the porcelain, especially pontics. Quite often the porcelain is too thick on the pontic and prevents the bridge from seating. But more important is the embrasure area of the crown. If the porcelain is too thick on the collars of the crown or the embrasure space around the tooth, the soft tissue will not allow it to seat. This is the reason a thin metal collar for porcelain-fused-to-metal (PFM) restorations was so widely used in the past. The metal is at its thinnest, so the restoration can be too, and it will easily fit between the tooth and the soft tissue. Using a fit checker on the saddle of the porcelain and looking at the spring around the crown will let you know if you need to thin out the embrasure and the thickness at the crown margins. This will enable the crown to seat.
Conclusion
Communication between the dentist and lab tech is crucial to avoid these problems. If a patient has issues that prevent getting a good impression, it can be helpful to take one master impression and another solo impression of the prep. The tech will wax on the full model but take care of the margins from the other die. Be sure to discuss this with your lab tech first. Maybe you both will just agree to finesse the die on this one. Communicate with the lab about the sensitivity of soft tissue and tightness of soft tissue in an implant crown to avoid ill-fitting crowns. Being open to discussion before and after making a restoration is vital to maintaining a harmonious relationship and partnership between lab and dentist. No one is at fault when everyone works together.
Editor’s note: This article originally appeared in Perio-Implant Advisory, a chairside resource for dentists and hygienists that focuses on periodontal- and implant-related issues. Read more articles and subscribe to the newsletter.
Steven Pigliacelli, MDT, CDT, is the owner and vice president of Marotta Dental Studio, and has more than 30 years’ experience as a dental implant specialist. He is a faculty instructor in postgraduate prosthodontics at New York University, College of Dentistry, in the department of prosthodontics. He is the founder and past president of the Association of Innovative Dentistry, manages Marotta Dental Studio, and is the technical liaison between the dentist and the laboratory. He also directs the lab’s GPR and Prosthetic Resident Rotation. Contact him at marottadental.com or (866) 627-6882.
About the Author

Steven Pigliacelli, MDT, CDT
Steven Pigliacelli, MDT, CDT, has more than 30 years’ experience as a dental implant specialist. He is the owner and vice president of Marotta Dental Studio and serves as the technical liaison between the dentist and the laboratory. He also directs the lab’s GPR and Prosthetic Resident Rotation. He is a faculty instructor in postgraduate prosthodontics at New York University, College of Dentistry, in the department of prosthodontics. Contact him at marottadental.com or (866) 627-6882.
Updated August 2, 2023